By Dee Archibald
Do you love to fossick the beach as much as I do?! Nothing quite like after a storm when the beaches are abundant with glorious driftwood! But what to do with it after you’ve smuggled it home. Here’s a couple of ideas I’ve had a go at that I thought you’d like….
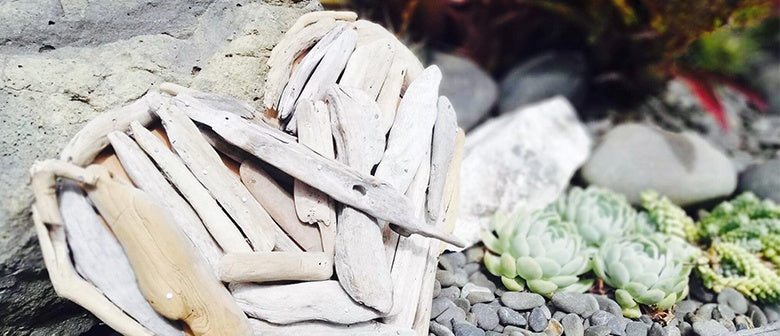
Driftwood Shapes
You will need:
- Cardboard
- Small nails
- Glue gun
Instructions:
Step 1: Cut your shape from the cardboard. Ideas could include; hearts, stars, words, or if you want to get really technical try an animal or a sea creature like a crab.
Step 2: Start by laying out your driftwood around the edge first, you will need curvy pieces as well as straight. Then fill the middle until there are no more gaps layering them so they have something to stick to. It’s a bit like a jigsaw or a mosaic so you will need to have a play with switching pieces to get the right fit.

Step 3: Without disturbing your placement too much, glue the bottom pieces to the cardboard and the top layer to the bottom pieces.

Step 4: If you’re keeping your shape indoors you can leave it like this. Alternatively to have a piece of art for your outdoor garden you will need to give it some reinforcement! Hammer in some nails to connect the top layers to the bottom, side to side and so on. Once it’s all secure and in one piece you can either peel the card board off the back or leave it there to weather off in its own time.

Driftwood Lantern
You will need:
- A glass jar
- A glue gun
This one is relatively straight forward, just glue driftwood pieces all the way around your jar and add a candle! Make sure when you’re gluing that no pieces go below the base of the jar or it’s going to end up all wobbly. Also, it won’t matter if you can see the jar in places as that only adds to the lantern effect when your candle is lit.

Happy Crafting x