By Dee Archibald
I’m making a huge effort to avoid plastic bottles in my home. Yes, they can get recycled after use but only into other harder plastic items and let’s face it NZ is having a bit of a crisis in this department! My theory is to eliminate them as much as possible!
There’s something pretty great about making your own cosmetics. Firstly, you know exactly what’s going in them and the ingredients can be adapted to suit each and every skin type. Our skin absorbs everything we put on it like a sponge, so this is the perfect way of avoiding any nasties. Solid bars also don’t require any preservatives….bonus! Secondly, there’s something about measuring, melting, pouring, and testing the ingredients and turning your kitchen into a little makeshift Laboratory (or maybe that’s just me!)
This recipe can be adapted to suit you and can be as simplistic as 3 ingredients or as complicated as 10. The basic rule (to get it to set into a hard bar that melts when it touches your warm skin) is using 1/3 beeswax, 1/3 butter/s and 1/3 oil/s. You might like to research what butters and oils your skin type needs. Butters could include shea butter, cocoa butter, Kokum butter, avocado butter or mango butter. Oils could include jojoba oil, rose hip oil, castor oil, hempseed oil, coconut oil, almond oil….the list goes on!
In saying that, the recipe I’ve used below is one I’ve tried and tested for months and a pretty good all rounder which is also great for acne prone skin.
You will need:

1 tablespoon white bees wax
1 tablespoon shea butter (you can go slightly over the tablespoon here, I found adding slightly more butter gives a bar that soaks into your skin faster)
1 teaspoon cornflour (the cornflour gives it a silky feel and makes it less greasy)
1.5 teaspoons coconut oil
1 teaspoon castor oil
1/2 teaspoon hempseed oil
Few drops of vitamin E -I cut open a capsule for this (optional)
5 drops tea tree oil
10 drops lavender
(Essential oils are optional, you might like a non scented bar. There are some great essential oils that have wonderful skin benefits. However, make sure you research them first as some are not good for sun exposure)
www.purenature.co.nz or www.gonative.co.nz has everything you need in small amounts and is reasonably priced.
Instructions:
Step 1:
You can use a double boiler for this but a microwave works just as well if you don’t have much time or you’re impatient like me! Put your beeswax and butter into a Perspex jug and start to melt it. If using the microwave melt in 30 second bursts and use a whisk to stir in between bursts. When it has just started to melt add the cornflour, mixing well and melting until it is completely liquid.
Step 2:
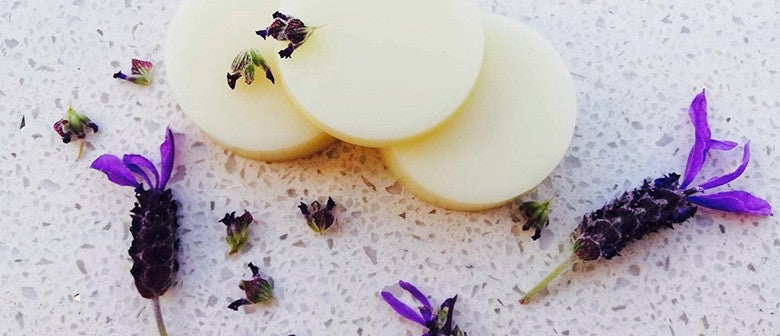
Add your oil/s (you might decide to keep it simple and just use 1 oil here instead of the combination I have used, just make sure to use 1 tablespoon whether it is combined or on its own.) Add your essential oils then mix and pour into silicon moulds. I’ve used a mini muffin mould which is a great size for these bars and it should make 3.
Step 3:
Let them set as is or carefully move them to a fridge or freezer to speed up the process. 
Tips: I found the best way to clean up is to wipe everything down with a paper towel then pop in the dishwasher. Store your bars in a cool dark place in some type of container or tin. If your bar is too soft or too hard for your liking you can melt it down again and add more beeswax to make it harder or more oil to soften it up, although be careful not to overheat it as the essential oils lose their good benefits.
Your bars are ready to use! Use sparingly as a daydream and be more heavy handed for a nightcream. I intended this recipe for the face but it could be used all over your body, even your lips!
Happy Crafting x